Chapter 6. Building a Quora like site
Topics in this chapter:
We have covered basics in last few chapters, like Generic Views, template languages, ORM, interaction with django admin etc. Now in this chapter we will be creating Custom User, who will be able to access the Qusetion and answers in the Quora like app.
Quora like Application:
We have checked Quora for checking many qusetions in our past. Qusetions may be both technical or non technical. In this tutorial we will be creating a Qura like application but not exactly the Quora.
Application Includes:
- Registering custom users (Substitute of django’s admin user)
- Custom Users Login/Logout Functionality
- Questions asked by users.
- Answered Questions by Users
- Dashboard user specific.
Django features to learn in this chapter:
- Class Based Views
- Basics of Django Testing
- Customising Users
Lets Begin
We will be creating a project from scratch, lets brush-up !!!
$ django-admin startproject quora
$ cd quora
$ python manage.py startapp core // Custom User Trick
Note
Never use the built-in Django User model directly, even if the built-in Django User implementation fulfill all the requirements of your application. Once you are done with customising your Custom user then only do makemigrations & migrate
Make custom user:
- Step 1): Goto
core/models.pyand add this
from django.db import models
from django.contrib.auth.models import AbstractUser


class User(AbstractUser):
    pass
- Step 2): In your settings.py file add a line just after ALLOWED_HOSTS = [].
AUTH_USER_MODEL = 'core.User' // It can be kept anywhere in the file but good to keep just after Allowed hosts.
Note
Don’t forget to add your newly created app to installed apps in settings.py file.
INSTALLED_APPS = [
    'django.contrib.admin',
    . . .
    . . .
    'core',
]
Congratulations you have customised your Django user Model. now lets migrate changes.
$ python manage.py makemigrations
$ python manage.py migrate
$ python manage.py createsuperuser // follow the instructions
We will now create the Custom user’s entry in Django Admin, as by the above process we won’t be able to see its entry in Django admin’s dashboard. So , in core/admin.py we should add :
from django.contrib import admin
from django.contrib.auth.admin import UserAdmin
from .models import User

admin.site.register(User, UserAdmin)
Class Based Views
Class-based views provide an alternative way to implement views as Python objects instead of functions. They do not replace function-based views, but have certain differences and advantages when compared to function-based views:
- Organization of code related to specific HTTP methods (GET, POST, etc.) can be addressed by separate methods instead of conditional branching.
- Object oriented techniques such as mixins (multiple inheritance) can be used to factor code into reusable components.
Example
from django.http import HttpResponse
// Function Based View.
def my_view(request):
    if request.method == 'GET':
        # <view logic>
        return HttpResponse('result')

from django.http import HttpResponse
from django.views import View
// Class Based View
class MyView(View):
    def get(self, request):
        # <view logic>
        return HttpResponse('result')
Register Custom User
Now that we are aware of Class Based View let’s implement user registration using the same.
Add the below code to core/forms.py
from django import forms
from .models import User

class RegisterForm(forms.ModelForm):
    password = forms.CharField(widget=forms.PasswordInput())

    class Meta:
        model = User
        fields = ['email', 'first_name', 'last_name', 'password', 'username']
We will now use the above forms in our views, add the below code to core/views.py.
from django.shortcuts import render
from .forms import RegisterForm
from django.contrib.auth import login
from django.contrib.auth.hashers import make_password


class RegisterView(FormView):

    def get(self, request):
        content = {}
        content['form'] = RegisterForm
        return render(request, 'register.html', content)

    def post(self, request):
        content = {}
        form = RegisterForm(request.POST, request.FILES or None)
        if form.is_valid():
            user = form.save(commit=False)
            user.password = make_password(form.cleaned_data['password'])
            user.save()
            login(request, user)
            return redirect(reverse('dashboard-view'))
        content['form'] = form
        template = 'register.html'
        return render(request, template, content)
There are few thing which we have imported like login(), make_password() etc, it will be good to know about them.
- To log a user in, from a view, use
login(). It takes an HttpRequest object and a User object. login() saves the user’s ID in the session, using Django’s session framework. make_passwordcreates a hashed password in the format used by this application. It takes one mandatory argument: the password in plain-text.- we will talk about
dashboard-viewfurther in this tutorial. For now just relate it like, once you register yourself you will be redirected to thedashbord-view.
Its still not over we still have to make some modifications in settings.py , urls.py and adding of templates. If you have followed previous chapters you may try on your own. Still you can refer to content below.
Add below code to core/urls.py and quora/urls.py respectively.
from django.urls import path
from .views import RegisterView

urlpatterns = [
    path('register/', RegisterView.as_view(), name='register-view'),
]

// quora/urls.py
from django.contrib import admin
from django.urls import path, include

urlpatterns = [
    path('admin/', admin.site.urls),
    path('core/', include('core.urls')),
]
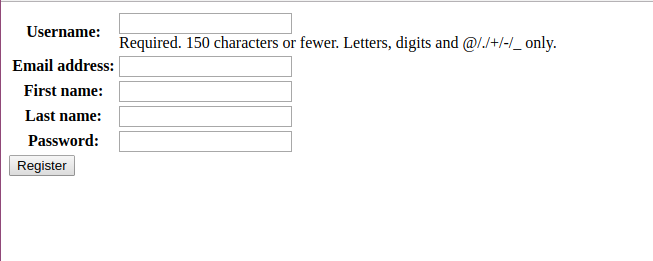
Now we will add a new directory to our project as project/templates in our case quora/templates. And inside templates directory add a new file templates/register.html and add the below code.
<form action="" method="POST">
{% csrf_token %}
<table>
    {{ form.as_table }}
</table>
<input type="submit" name="register" value="Register" />
</form>
Runserver and go to localhost:8000/core/register/
What next? Take some time and think what will be the next thing to do. And come back to te chapter.
Yes, you are right , after registering the user we will redirect him to his dashboard and also create a way by which he/she could login and logout from the application. And the code for this can be found below.
core/views.py
from django.shortcuts import render
from django.shortcuts import HttpResponseRedirect, redirect
from django.urls import reverse
from django.views.generic.edit import FormView
from django.utils.decorators import method_decorator
from django.views.decorators.csrf import csrf_exempt
from django.contrib.auth import authenticate
from django.contrib.auth import login, logout
from django.contrib.auth.hashers import make_password
from .models import User
from questans.models import Questions, Answers, QuestionGroups
from .forms import LoginForm, RegisterForm


class DashboardView(FormView):

    def get(self, request):
        content = {}
        if request.user.is_authenticated:
            user = request.user
            user.backend = 'django.contrib.core.backends.ModelBackend'
            ques_obj = Questions.objects.filter(user=user)
            content['userdetail'] = user
            content['questions'] = ques_obj
            ans_obj = Answers.objects.filter(question=ques_obj[0])
            content['answers'] = ans_obj
            return render(request, 'dashboard.html', content)
        else:
            return redirect(reverse('login-view'))


class RegisterView(FormView):

    @method_decorator(csrf_exempt)
    def dispatch(self, request, *args, **kwargs):
        return super(RegisterView, self).dispatch(request, *args, **kwargs)

    def get(self, request):
        content = {}
        content['form'] = RegisterForm
        return render(request, 'register.html', content)

    def post(self, request):
        content = {}
        form = RegisterForm(request.POST, request.FILES or None)
        if form.is_valid():
            save_it = form.save(commit=False)
            save_it.password = make_password(form.cleaned_data['password'])
            save_it.save()
            login(request, save_it)
            return redirect(reverse('dashboard-view'))
        content['form'] = form
        template = 'register.html'
        return render(request, template, content)


class LoginView(FormView):

    content = {}
    content['form'] = LoginForm

    @method_decorator(csrf_exempt)
    def dispatch(self, request, *args, **kwargs):
        return super(LoginView, self).dispatch(request, *args, **kwargs)

    def get(self, request):
        content = {}
        if request.user.is_authenticated:
            return redirect(reverse('dashboard-view'))
        content['form'] = LoginForm
        return render(request, 'login.html', content)

    def post(self, request):
        content = {}
        email = request.POST['email']
        password = request.POST['password']
        try:
            users = User.objects.filter(email=email)
            user = authenticate(request, username=users.first().username, password=password)
            login(request, user)
            return redirect(reverse('dashboard-view'))
        except Exception as e:
            content = {}
            content['form'] = LoginForm
            content['error'] = 'Unable to login with provided credentials' + e
            return render_to_response('login.html', content)


class LogoutView(FormView):

    def get(self, request):
        logout(request)
        return HttpResponseRedirect('/')
core/urls.py
from django.contrib import admin
from django.urls import path
from .views import LoginView, RegisterView, DashboardView, LogoutView

urlpatterns = [
    path('login/', LoginView.as_view(), name='login-view'),
    path('register/', RegisterView.as_view(), name='register-view'),
    path('dashboard/', DashboardView.as_view(), name='dashboard-view'),
    path('logout/', LogoutView.as_view(), name='logout-view'),
]
We have also configured two more templates i.e., templates/login.html and templates/dashboard.html with minimal functionality.
// login.html
<form action="" method="POST">
    {% csrf_token %}
    <table>
        {{ form.as_table }}
    </table>
    <input type="submit" name="login" value="Login" />
</form>
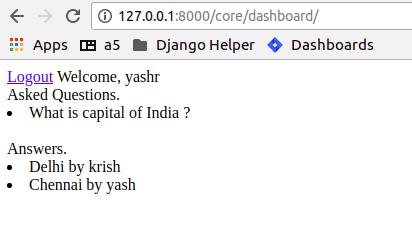
// dashboard.html
<a href='{% url "logout-view" %}'>Logout</a>
Welcome,
{{userdetail.username}}
<br/>
Asked Questions.
<br/>
{% for question in questions %}
<li>{{question.title}}</li>
{% endfor %}
<br/>
Answers.
{% for answer in answers %}
<li>{{answer.answer_text}} by {{answer.user.username}} </li>
{% endfor %}
So, the login page looks like

and dashboard is like
Wait, are we missing something ? Yes, till now we haven’t discussed about the adding Questions and Answers in the Quora app, which is the foundation for the application.
Create an app in django let’s name it as questans and add the below code to its models.
$ python manage.py startapp questans
Now in questans/models.py lets add the below code.
from django.db import models
from django.conf import settings
from django.utils.text import slugify

class Questions(models.Model):
    user = models.ForeignKey(settings.AUTH_USER_MODEL, on_delete=models.CASCADE, null=True, blank=True)
    title = models.TextField()
    group = models.ForeignKey('QuestionGroups', on_delete=models.CASCADE, null=True, blank=True)
    created_on = models.DateTimeField(auto_now=True)
    updated_on = models.DateTimeField(auto_now_add=True)
    slug = models.SlugField()

    def save(self, *args, **kwargs):
        self.slug = slugify(self.title)
        super(Questions, self).save(*args, **kwargs)

    def __unicode__(self):
        return self.title


class Answers(models.Model):
    user = models.ForeignKey(settings.AUTH_USER_MODEL, on_delete=models.CASCADE)
    question = models.ForeignKey(Questions, on_delete=models.CASCADE)
    answer_text = models.TextField()
    is_anonymous = models.BooleanField(default=False)

    def __unicode__(self):
        return self.id


class QuestionGroups(models.Model):
    name = models.CharField(max_length=100)

    def __unicode__(self):
        return self.name
Things to note in above code
- In Question models we have created a
slugfield to make it more readable. - We have also given flexibility for the user to save its answer anonymously.
- QuestionGroup is kept to differentiate question of different topics.
For now we can add questions and answers in the Quora app using its admin and make it more interactive in next part Quora with bootstrap. Add the below code to questans/admin.py.:align:
from django.contrib import admin
from .models import Questions, Answers, QuestionGroups


class AnswerInline(admin.TabularInline):
    model = Answers


class QuestionsAdmin(admin.ModelAdmin):

    inlines = [AnswerInline]
    class Meta:
        model = Questions


class QuestionGroupsAdmin(admin.ModelAdmin):

    class Meta:
        QuestionGroups

admin.site.register(Questions, QuestionsAdmin)
admin.site.register(QuestionGroups, QuestionGroupsAdmin)
Now our MVP of quora application is ready. We will discuss about Django’s Testing Framework.
Basics of Django Testing:
Django’s unit tests use a Python standard library module: unittest. This module defines tests using a class-based approach
We have described very basic example for testing our appication. Add the below code to core/tests.py
from django.test import TestCase
from .models import User

class LogInTest(TestCase):
    def setUp(self):
        self.credentials = {
            'username': "demo",
            'email': 'demo@gmail.com',
            'password': 'secret',
            'first_name': 'demo',
            'last_name': 'user',
        }
        User.objects.create_user(**self.credentials)

    def test_register(self):
        response = self.client.post('/core/register/', self.credentials, follow=True)
        self.assertEqual(response.status_code, 200)

    def test_user(self):
        user = User.objects.get(username="demo")
        self.assertEqual(user.username, "demo")
Run tests using the below command.
$ python manage.py test